Multiple Shot Amazon Build Guide
By the DiabloBytes team · Updated March 2026
Overview
The Multiple Shot Amazon fires a wide fan of arrows that covers the entire screen in a single cast. While each individual arrow deals reduced damage (approximately 75% of normal weapon damage), the sheer number of projectiles — capped at 24 arrows — makes Multishot the undisputed king of open-area clearing. Nothing beats it in wide-open maps where Strafe would waste arrows on empty space.
The build pairs Multiple Shot with Guided Arrow for single-target work. Guided Arrow is a homing projectile that tracks enemies regardless of line of sight and always hits — no attack rating check. Magic Arrow rounds out the kit, handling physical immune monsters and acting as a free arrow source (it doesn't consume any quantity). Together these three skills cover every encounter type in the game without needing a curse or aura to handle immunities.
The build's main weaknesses: it is extremely gear-dependent, relies entirely on run/walk for mobility (no Teleport without Enigma), and the mercenary contributes minimal DPS — you are the damage. Mana consumption from Multiple Shot is also significant; mana leech or Insight merc are essential early on.
Strengths
- Full-screen clear with 24 arrows
- Fast-paced, high-APM playstyle
- Massive single-target DPS with Guided Arrow
- Magic Arrow handles physicals without curses
- Valkyrie acts as a reliable front-line tank
Weaknesses
- Incredibly gear-dependent
- Mercenary provides negligible DPS
- Run/walk only — no built-in mobility
- Required BiS gear is difficult to obtain
- Physical immunes require specific counters
Skill Allocation
The skill priority is: 1 point into each utility passive first, then max skills in order — Pierce first (until 69% chance), then Multiple Shot, Critical Strike, Penetrate, Guided Arrow, and finally Magic Arrow with leftover points.
1 Point Prerequisites
Max in Order
IAS Breakpoints
Increased Attack Speed (IAS) is one of the most critical stats for this build. Multiple Shot's damage output scales directly with how fast you can fire. The target is the 7-frame attack breakpoint — the fastest achievable for Windforce and most endgame bows. Consult the D2Planner for precise IAS requirements based on your specific bow.
Stat Points
Bowazon stat allocation is different from most builds: Dexterity is your primary damage stat, not Vitality. Bows scale directly with Dexterity, so every excess point you have goes into Dex — not Vit.
Gear
Key needs for this build: 100% Chance to Pierce, sufficient IAS to hit breakpoints, high min/max bow damage, Cannot Be Frozen, and mana/life leech. Every gear choice should serve at least one of these requirements.
Budget (Hell Starter)
Bow: Buriza-Do Kyanon (Ballista) — provides 100% Chance to Pierce built-in, high cold damage, and solid physical damage. The pierce alone frees up skill points and the belt slot from needing Razortail.
Armor: Treachery — IAS for faster Multi-Shot casting, Fade proc for resistances. Excellent budget armor.
Belt: Razortail — 33% pierce stacks with skill-based pierce to reach 100%. If using Buriza, this slot opens up for other options like Death's Guard.
Gloves: Death's Hand — pairs with Death's Guard for Cannot Be Frozen, 30% IAS, and 8% life leech in two cheap set pieces.
Belt (alt): Death's Guard — pairs with Death's Hand. Together they grant Cannot Be Frozen, IAS, and life leech.
Amulet + Rings: Angelic Wings + Angelic Halo — these two set pieces together grant enormous Attack Rating based on character level, critical for landing hits in Hell.
Helm: Harlequin Crest (Shako) — +2 skills, life, mana. Excellent all-rounder.
Boots: War Traveler or rare boots with Faster Run/Walk and resistances.
Mid-Tier
Bow: Windforce — massive raw physical damage, built-in mana leech, and knockback. The highest single-arrow damage before Faith. Requires 188 Strength base.
Helm: Giant Skull — +2 Strength, knockback, 25-50% Crushing Blow. Excellent physical DPS amplifier. Socket with IAS jewel.
Gloves: Laying of Hands — 20% IAS, 350% damage to Demons, fire damage. BiS gloves for Demon-heavy zones.
Belt: Razortail — pierce is non-negotiable. Even with 24 arrows, pierce turns Multishot into a true screen-clearer.
Rings: Raven Frost (Cannot Be Frozen, AR, Dex) + rare ring with life/mana leech.
Best-in-Slot (BiS)
Bow: Faith runeword (Ohm + Jah + Lem + Eld) in a +3 Multiple Shot Grand Matron Bow (GMB) — grants level 12-15 Fanaticism aura for IAS and damage, high Enhanced Damage, and Ignore Target Defense. This is the endgame bow for all physical bow builds. Requires 108 Strength, 152 Dexterity.
Helm: Rare Jeweler's Diadem (4os) with IAS jewels, or Andariel's Visage for IAS + life leech + +2 skills. Giant Skull remains strong for Crushing Blow.
Armor: Jeweler's Dusk Shroud of Stability (4os with Ruby Jewels of Fervor) for IAS, or Enigma for Teleport repositioning. Fortitude for pure damage.
Belt: Razortail — pierce remains essential even at BiS.
Amulet: Highlord's Wrath — +1 skills, IAS, Deadly Strike (stacks with Critical Strike for ~82% effective double-damage chance).
Gloves: Laying of Hands (Demon zones) or Lava Gout (for IAS + Enchant synergy when using Demon Limb prebuff).
Boots: Gore Rider — Crushing Blow, Deadly Strike, Open Wounds stack well with the high attack speed. War Traveler for MF runs.
Charms: Bow & Crossbow Skillers, Annihilus, Hellfire Torch, Bone Break (for physical immune zones), small charms with life/resist/FRW.
Swap: Call to Arms + Spirit Monarch for Battle Orders/Command prebuff.
📺 Video Guides
Learn this build from the best D2R content creators:
Guide by Dbrunski125 — Faith Multi-Shot Amazon full build guide
Covers both Multishot and Strafe for physical bow builds — excellent IAS calculator reference included
Mercenary
Act 2 Nightmare Offensive mercenary with Might aura. The merc's DPS contribution is minimal — he's here for the Might aura's physical damage amplification and to proc Decrepify via The Reaper's Toll, which dramatically increases kill speed against physical immunes, high-resistance monsters, and bosses.
Budget Merc Note: During early progression, use an Act 2 Offensive merc with an Insight polearm (Ral + Tir + Tal + Sol). The Meditation aura solves all mana issues and lets you ignore mana leech on gear until you can afford better.
Leveling Progression
The Bowazon levels smoothly. Bows have always been strong in Normal and Nightmare. Max Multiple Shot as your first priority during leveling; the other skills come online in Hell.
Playstyle Tips
- This is a glass cannon. Your job is to kill everything before it touches you. Know the mob types in your target area and position to maximize arrow spread through packs.
- Pierce is your multiplier. Line up packs so arrows pass through multiple enemies. A single piercing arrow hitting 5 enemies is 5x the DPS of one that hits 1.
- Cursor placement controls spread. Close cursor = wide spread (better for surrounding mobs). Far cursor = tight volley (better for distant packs in a line).
- Magic Arrow costs zero arrows. Use it on stragglers and bosses rather than burning through arrow stacks with Multiple Shot or Guided Arrow.
- Prebuff with Call to Arms: Cast Battle Command then Battle Orders on swap before every farming session for +1 skill and massive life/mana boost. This survives until you die.
- Keep moving. Run 1-2 steps between shots rather than standing still. The Bowazon's ideal is run-and-gun, not stationary turret. Valkyrie + Decoy hold the line while you circle.
- Physical Immunes: Tag them with Reaper's Toll Decrepify proc via your merc, then finish with Magic Arrow. Bone Break charm helps if you farm immune-heavy zones like Chaos Sanctuary.
Filter for Multishot Drops
Highlight Windforce, Faith rune components (Ohm, Jah, Lem, Eld), Razortail, Highlord's Wrath, The Reaper's Toll, Laying of Hands, and Bow & Crossbow skillers.
Open Loot Filter Configurator →Build Summary
- Class Amazon
- Primary Skill Multiple Shot
- Boss Skill Guided Arrow
- Immune Handler Magic Arrow
- Damage Type Physical + Magic
- Best Area Open maps / Cows
- MF Viable Yes (War Traveler)
- Difficulty High (glass cannon)
- Tier A
- Key Item Faith / Windforce
- Merc A2 NM Might
⚔️ Get More Loot with Better Gear
Upgrade your D2R setup. Buying through these links supports DiabloBytes at no extra cost to you.

HyperX Cloud Alpha Wireless
300-hour battery life. Go wireless without ever worrying about charging mid-grind.
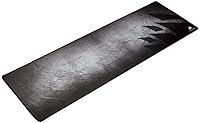
Corsair MM300 Extended
Anti-fray stitched edges. Durable desk mat that survives thousands of clicks.

Xbox Wireless Controller (2025)
D2R has full controller support. Kick back on the couch for casual farming runs.
As an Amazon Associate, DiabloBytes earns from qualifying purchases.